Are you tired of your Facebook app running slow or freezing up? It may be time to clear your cache! Clearing your cache can help speed up your app by removing old data that is stored on your device. In this post, we will show you how to clear cache on Facebook with these simple steps.
Clearing your cache is an easy process that can be done in just a few steps. By following our guide, you can quickly free up space on your device and make your Facebook app run smoothly again. Don’t let a slow app hold you back – read on to learn how to clear cache on Facebook and get back to scrolling through your newsfeed with ease.
Table of Contents
Why You Need to Clear Your Cache
As a savvy Facebook user, you may have noticed that your newsfeed has been a bit sluggish lately. Maybe your photos aren’t loading as quickly as they used to or perhaps messages are taking longer to send. If this is the case, then it’s time to clear your Facebook cache.
Now, you might be thinking, “What is cache and why do I need to clear it?” Well, my friend, let me tell you. Your cache is a collection of data that your browser stores on your device. This data includes images, videos, and other content that you’ve accessed on Facebook.
So, why do you need to clear it? Simply put, clearing your cache can help to improve your browsing experience. Over time, your cache can become cluttered with outdated data, which can slow down your device and cause problems with your browsing. By clearing your cache, you can free up space on your device and allow for a smoother browsing experience.
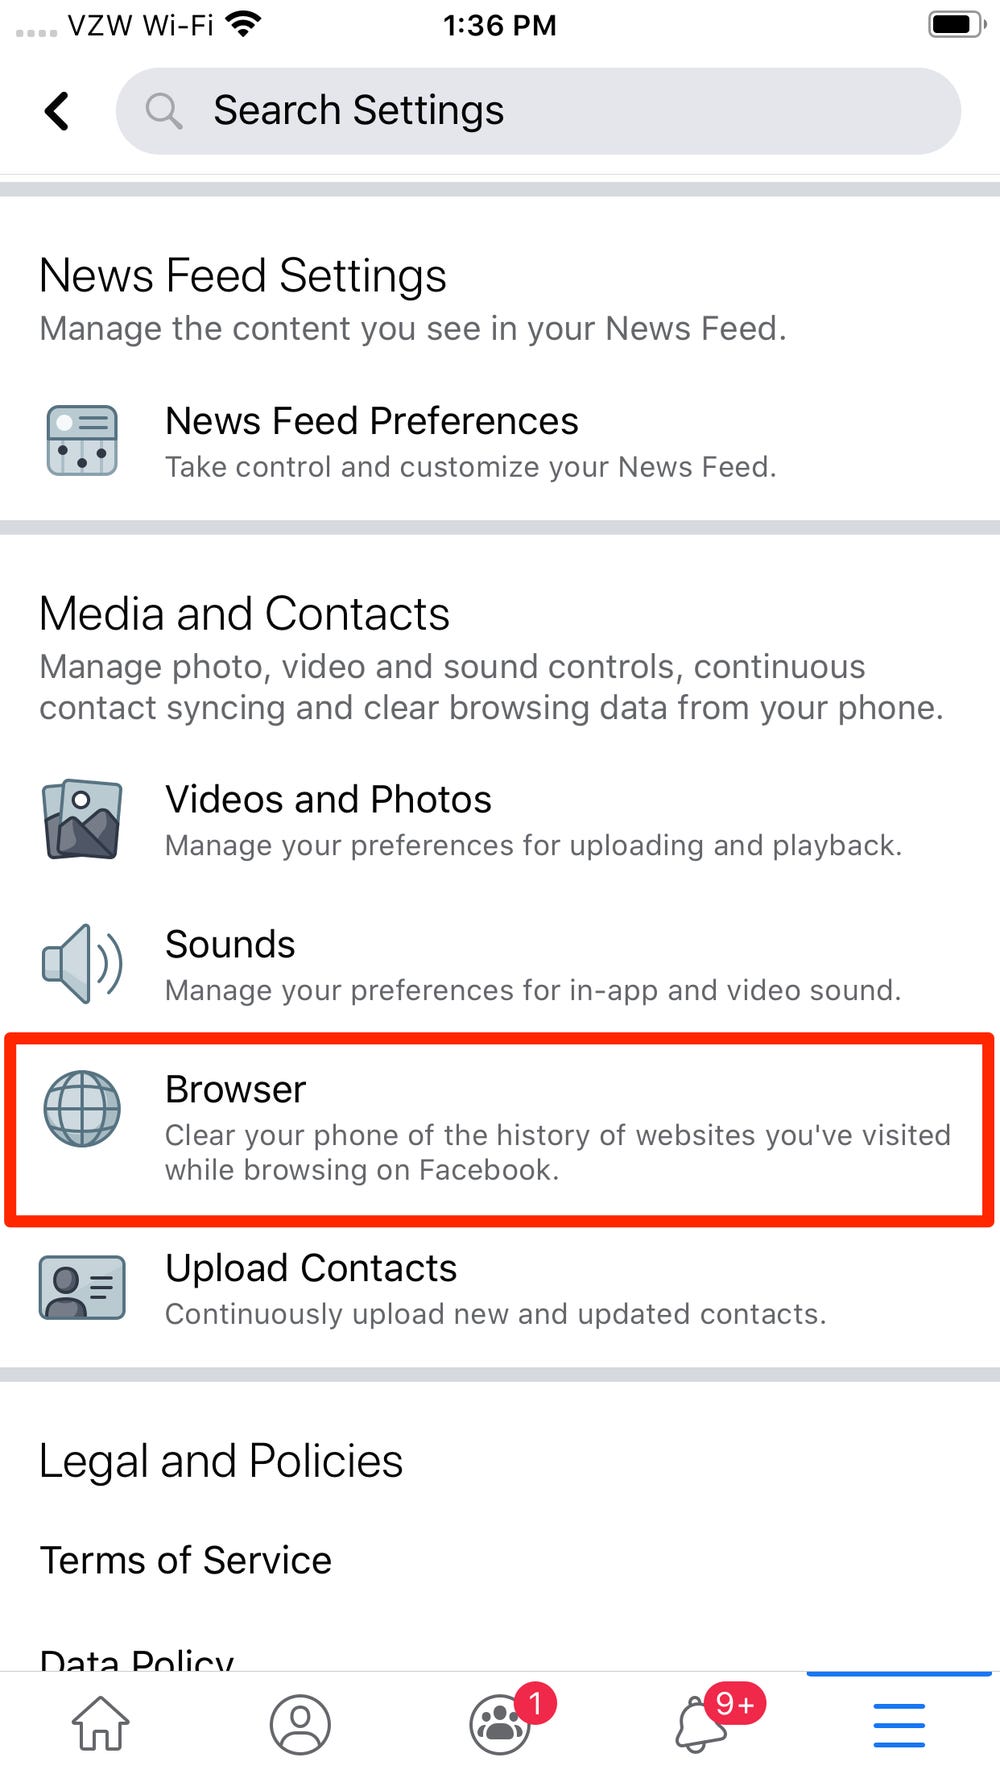
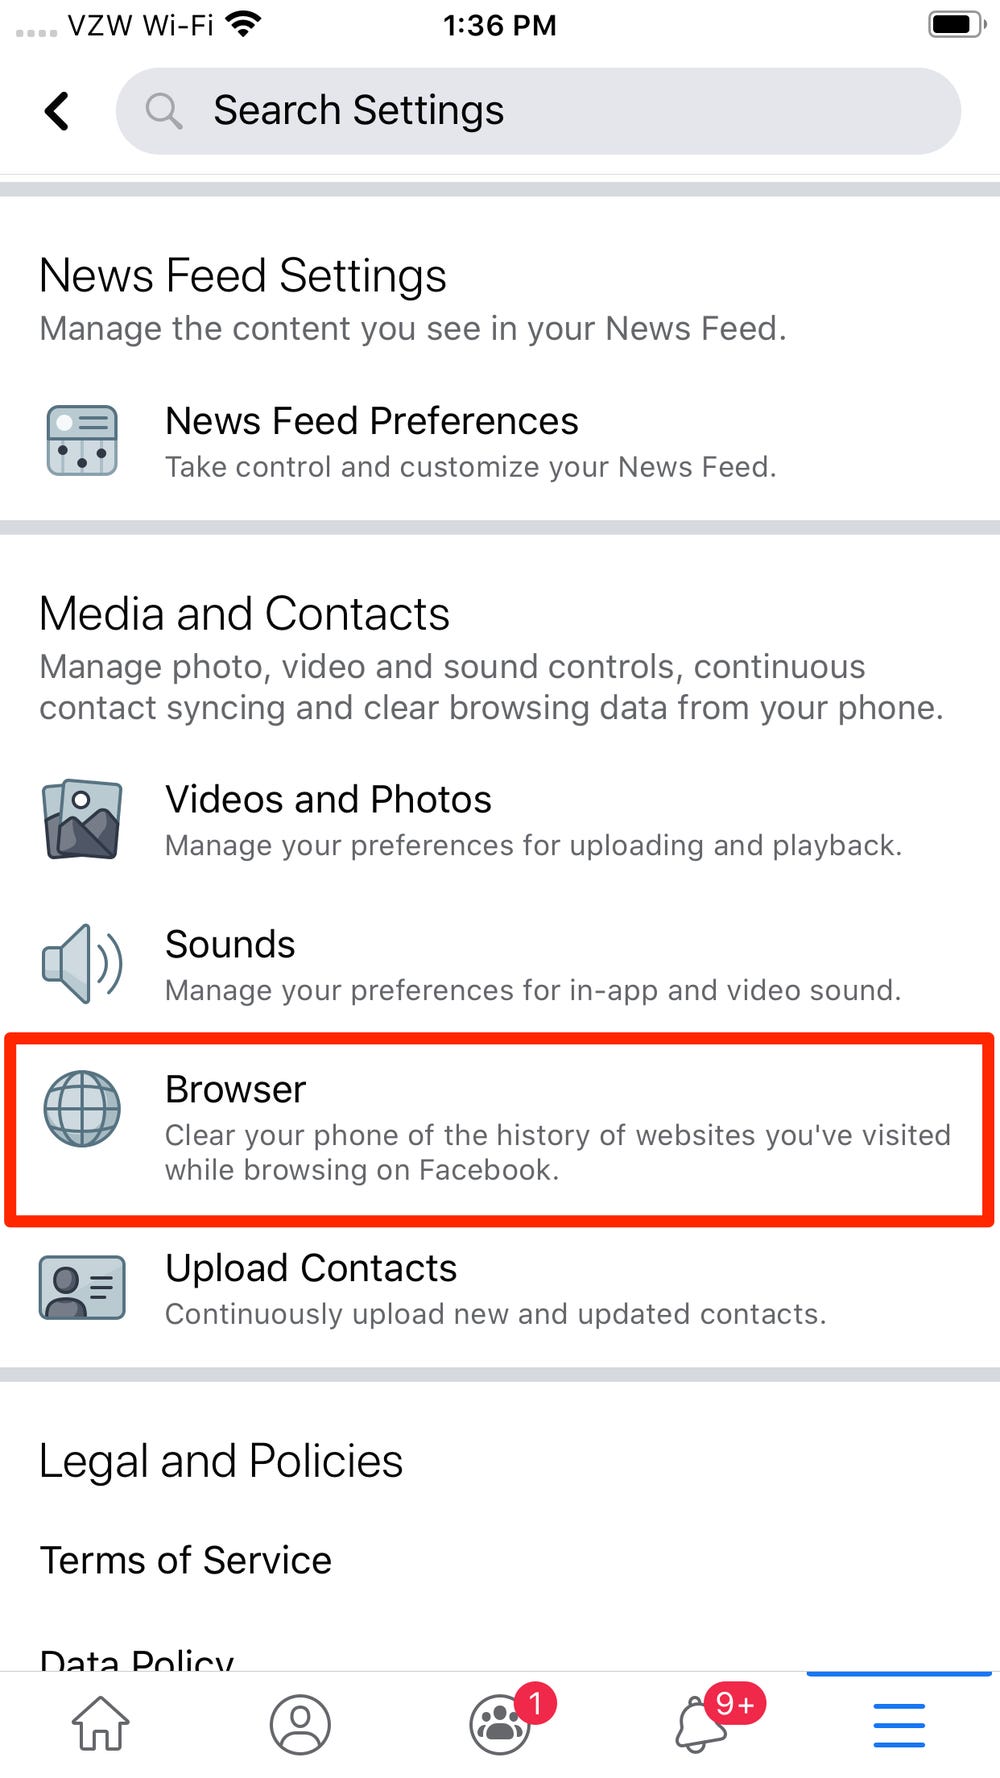
Now, let’s get down to the nitty-gritty. Clearing your Facebook cache is a simple process. First, open your Facebook app and tap on the three horizontal lines in the bottom right-hand corner. Next, scroll down and tap on “Settings & Privacy,” followed by “Settings.” From there, tap on “Media and Contacts,” and then “Clear Cache.”
Voila! Your Facebook cache has been successfully cleared. You should notice a difference in your browsing experience immediately.
In conclusion, clearing your Facebook cache is a simple yet effective way to improve your browsing experience. By freeing up space on your device, you can enjoy faster load times, smoother browsing, and an overall better experience on Facebook. So, what are you waiting for? Clear that cache and get back to scrolling through your newsfeed in style!
How to Clear Your Cache on Facebook
Are you tired of your Facebook app slowing down? One solution is to clear your cache. But what exactly is cache? Think of it as a memory bank that stores data to make loading faster. However, over time, this can accumulate and cause problems. Clearing your cache can help fix this issue.
To clear your cache on Facebook, the first step is to open the app and navigate to the settings menu. From there, select “Apps & Websites.” Next, locate the Facebook app and click on it. You will see an option to “Clear Cache.” Click it and wait for the process to finish.
But what if you’re using Facebook on a web browser? The process is similar. Firstly, open your browser and go to the Facebook website. Then, click on the small arrow in the top right corner and select “Settings & Privacy.” Next, choose “Settings” and click “Your Facebook Information.” Finally, select “Clear Browsing Data” and select “Cached Images and Files.” Click “Clear Data” and you’re done!
Remember, clearing your cache may log you out of Facebook temporarily. But don’t worry, simply log back in and your account will be back to normal.
In conclusion, clearing your Facebook cache is a simple process that can help speed up your app or browser. By following these simple steps, you can enjoy a smoother Facebook experience.
Benefits of Regularly Clearing Your Cache
Are you experiencing slow loading times on Facebook? Does the platform seem to be glitching more frequently? If so, it might be time to clear your cache. While many users may not be familiar with this process, regularly clearing your cache can have a positive impact on your Facebook experience.
One key benefit of clearing your cache is that it can free up storage space on your device. As you use Facebook, the platform stores data on your device to help it load faster in the future. However, over time, this data can accumulate and take up valuable space. By clearing your cache, you can remove this unnecessary data and create more room for other important files.
Another advantage of clearing your cache is that it can help improve the performance of Facebook. When your cache is full, it can slow down the loading times of pages, images, and videos on the platform. This can be frustrating for users who want to browse quickly and efficiently. By clearing your cache, you can help Facebook run more smoothly and efficiently.
Additionally, clearing your cache can help protect your privacy. When you use Facebook, the platform collects data on your browsing habits and preferences. While this data is used to personalize your experience, it can also be used for targeted advertising. By clearing your cache, you can remove this data and limit the amount of information Facebook has on you.
In conclusion, regularly clearing your cache can have numerous benefits for your Facebook experience. From freeing up storage space to improving performance and protecting your privacy, it is a simple yet effective way to enhance your overall experience on the platform. So, the next time you notice Facebook running slowly or glitching, take a few minutes to clear your cache and enjoy a faster and smoother browsing experience.
Frequently Asked Questions
What is cache on Facebook and why should I clear it?
Facebook is one of the most popular social media platforms around the world. It’s a great way to keep in touch with friends and family, share pictures, videos, and updates about your life. However, all this activity creates a lot of data, and Facebook stores this data on your device in a folder called cache.
Cache is a temporary storage area where information is kept to make it easier and faster to access. In the case of Facebook, your cache stores images, videos, and other data from your newsfeed, profile, and other features. This stored data helps Facebook load faster the next time you open the app or website.
But over time, the cache can accumulate a lot of data, and this can slow down your device and even cause some issues with the app. Clearing your Facebook cache is an easy way to free up space on your device and improve its performance.
To clear your Facebook cache, first, open the Facebook app on your device. Next, go to the settings menu, and then select “Apps and Websites.” From there, select Facebook, and then click on “Clear Cache.”
It’s important to note that clearing your Facebook cache will not delete any of your personal data or information. It will only delete the temporary data stored in the cache folder.
In conclusion, clearing your Facebook cache is an essential step in keeping your device running smoothly and efficiently. By doing this, you can free up space on your device and improve its performance, which will make your experience on Facebook much more enjoyable. So go ahead and give it a try!
How do I clear my cache on Facebook using a computer or laptop?
Clear Your Facebook Cache with These Simple Steps
As a tech expert, I understand how important it is to clear your Facebook cache regularly. Your cache is a temporary storage area where Facebook stores your browsing data such as images, videos, and web pages. Over time, this data can accumulate and slow down your computer or laptop, causing performance issues and even security risks.
So, how do you clear your cache on Facebook using a computer or laptop? It’s simple. Follow these steps:
Step 1: Open Facebook on your browser.
Step 2: Click on the “Settings” button on the top right corner of the screen.
Step 3: Scroll down and click on “Settings and Privacy.”
Step 4: Click on “Settings.”
Step 5: Scroll down to the “Your Facebook Information” section and click on “Clear History.”
Step 6: Select the time range for which you want to clear your cache.
Step 7: Click on “Clear History” again to confirm.
Congratulations! You have successfully cleared your Facebook cache.
While the process may seem straightforward, there are a few things to keep in mind. For instance, clearing your cache will also delete your browsing history, so make sure to save any important information before doing so. Additionally, Facebook may take some time to clear your cache, so be patient and avoid refreshing the page.
In conclusion, clearing your Facebook cache is a simple but important step to ensure optimal performance and security. By following these steps, you can easily clear your cache and enjoy a faster and smoother browsing experience on Facebook.
Can I selectively clear my cache on the Facebook app for Android or iOS?
Clearing your Facebook cache is a simple task, but it can be confusing if you’re unsure of what you’re doing. If you’re using the Facebook app on Android or iOS, you might be wondering if you can selectively clear your cache. The answer is yes, and I’m here to walk you through the steps.
First, let’s talk about what a cache is. A cache is a temporary storage space where data is stored for quick access. When you use the Facebook app, it stores data such as images and videos in the cache to make the app run faster. However, over time, the cache can become cluttered and cause the app to slow down.
To selectively clear your Facebook cache on Android, go to the Settings app and select Apps & notifications. Find the Facebook app and tap on it. From there, select Storage & cache and then Clear cache. This will clear the cache for just the Facebook app.
On iOS, the process is a bit different. Go to the Facebook app and tap on the three horizontal lines in the bottom right corner. Select Settings & Privacy and then Settings. From there, scroll down and select Media and Contacts. Finally, tap on Clear Cache to clear the cache for just the Facebook app.
It’s important to note that clearing your cache may log you out of the app and delete any saved login information. However, it can also free up storage space on your device and improve the app’s performance.
In conclusion, clearing your Facebook cache is a quick and easy way to improve the app’s performance. With these simple steps, you can selectively clear your cache on Android or iOS and keep your app running smoothly. So, what are you waiting for? Give it a try and see the difference for yourself!
Conclusion
Thanks for visits imagerocket.net for reading this guide on how to clear your Facebook cache. By following the simple steps outlined in this article, you can easily free up space on your device and improve the performance of your Facebook app. Clearing your cache can also help protect your privacy by removing any stored data that you may not want to be saved.
Remember, regularly clearing your Facebook cache is an important habit to get into. It’s a simple and effective way to keep your device running smoothly, while also ensuring that your personal data is kept safe and secure.
If you have any questions or comments about this guide, please feel free to leave them in the comments section below. We hope that you found this article helpful, and that you’re now able to easily clear your Facebook cache whenever you need to. Thanks again for reading!


