Are you tired of relying on a Wi-Fi network to transfer files between your Android device and another? Well, Wi-Fi Direct is the solution you’ve been looking for. With Wi-Fi Direct, you can connect two devices directly and transfer files without the need for a Wi-Fi network or hotspot. In this step-by-step guide, we’ll show you how to enable Wi-Fi Direct on your Android device.
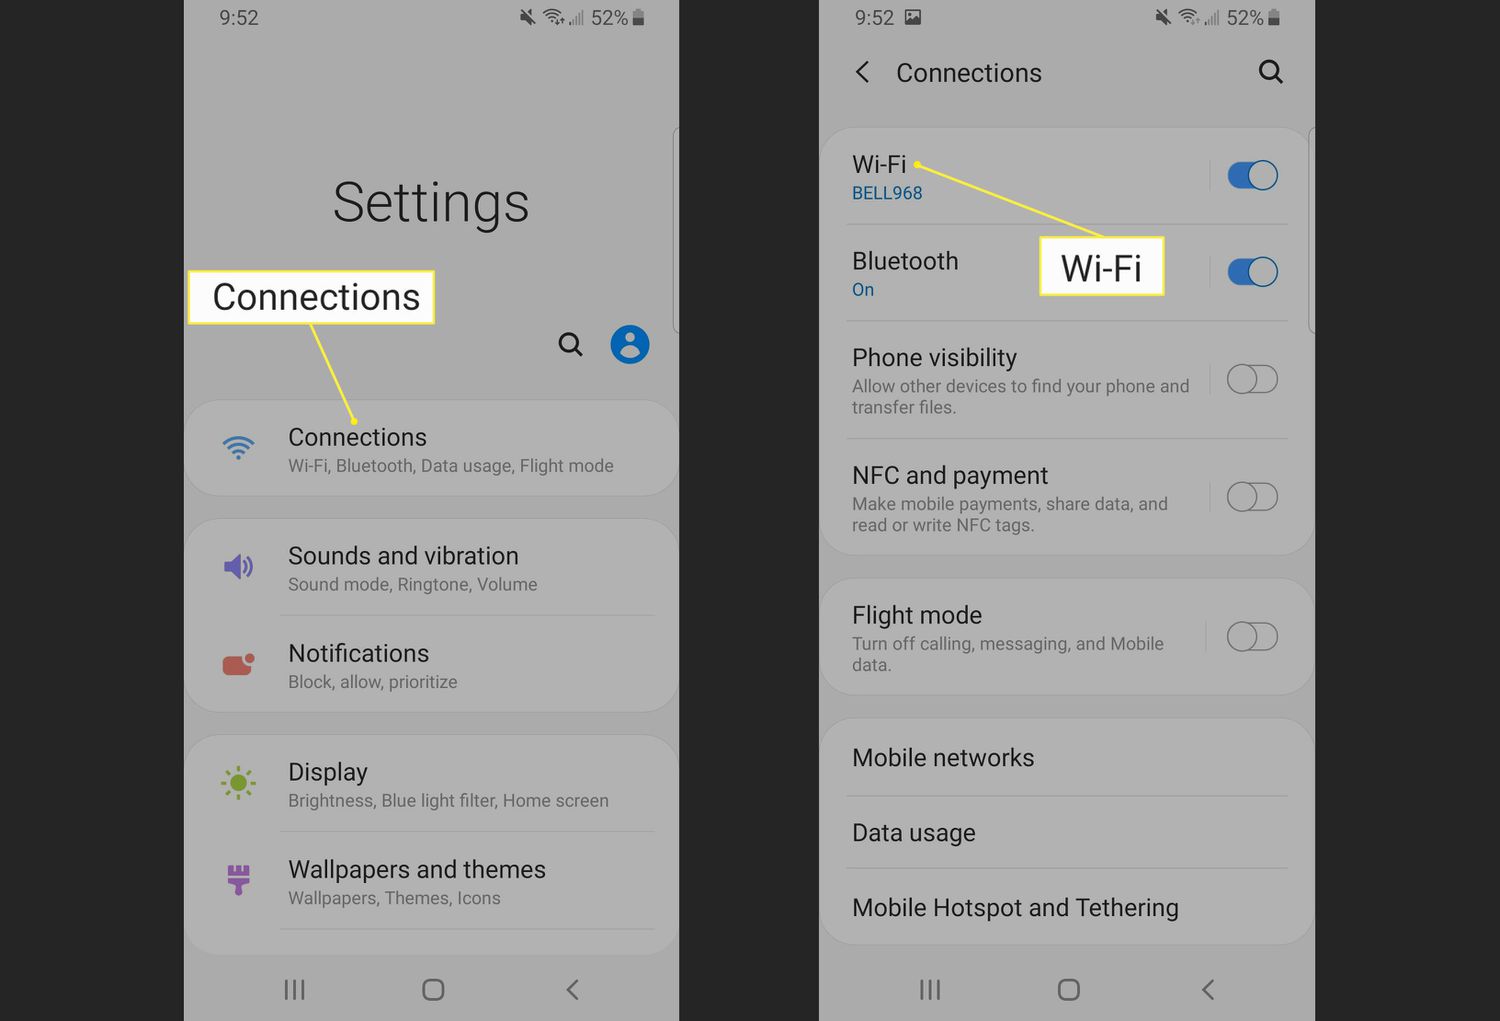
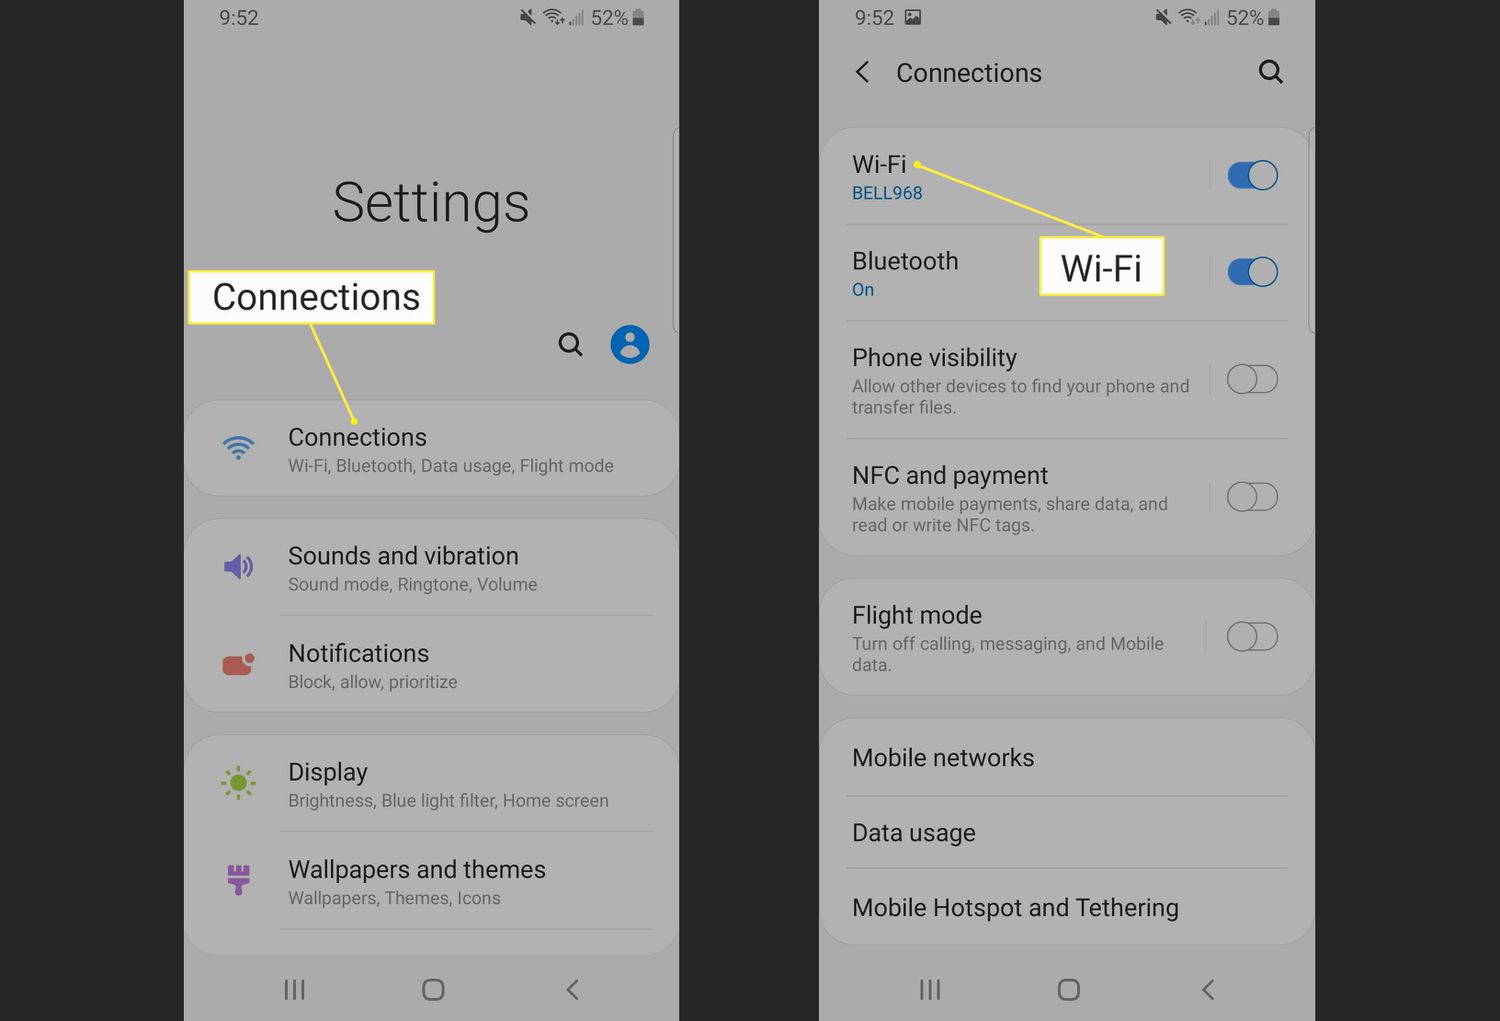
Enabling Wi-Fi Direct on your Android device is a straightforward process. However, the location of the settings may differ depending on the Android version and device manufacturer. But don’t worry, we’ve got you covered. Whether you’re using a Samsung, Google, or any other Android device, we’ll guide you through the process. So, let’s get started on how to enable Wi-Fi Direct on Android.
Are you tired of constantly searching for Wi-Fi networks and sharing passwords? Wi-Fi Direct is here to save the day! Wi-Fi Direct allows you to connect two devices directly to each other without the need for a Wi-Fi network or hotspot. In this step-by-step guide, we’ll show you how to enable Wi-Fi Direct on your Android device.
Table of Contents
1. Understanding Wi-Fi Direct
Wi-Fi Direct is a wireless technology that allows two devices to connect directly to each other without the need for a third-party network. This means that you can transfer files, share screens, and even play games with another device without the need for an internet connection. Wi-Fi Direct uses Wi-Fi Direct-certified devices to create a secure connection between devices.
2. Checking Device Compatibility
Before enabling Wi-Fi Direct on your Android device, you’ll need to make sure that your device is compatible. Most Android devices with Android 4.0 or higher are Wi-Fi Direct-enabled. To check if your device is compatible, go to your device’s settings and look for the Wi-Fi Direct option. If you can’t find it, your device may not be compatible.
3. Activating Wi-Fi Direct
Once you’ve confirmed that your device is compatible, you can activate Wi-Fi Direct by following these simple steps:
1. Go to your device’s settings and select “Wi-Fi.”
2. Tap on the three-dot icon in the top-right corner of the screen.
3. Select “Wi-Fi Direct.”
4. Toggle the switch to “On.”
Your device is now Wi-Fi Direct-enabled and ready to connect to other devices.
4. Connecting Devices
Connecting devices using Wi-Fi Direct is easy. Here’s how to do it:
1. Go to the other device’s settings and select “Wi-Fi.”
2. Tap on the three-dot icon in the top-right corner of the screen.
3. Select “Wi-Fi Direct.”
4. Select your device from the list of available devices.
5. Accept the connection request on your device.
Once the connection is established, you can start transferring files, sharing screens, or playing games with the other device.
5. Troubleshooting Wi-Fi Direct Connection
If you’re having trouble connecting your device to another device using Wi-Fi Direct, try the following troubleshooting tips:
– Make sure both devices are Wi-Fi Direct-enabled.
– Make sure both devices are within range of each other.
– Restart both devices and try again.
– If you’re still having trouble, contact your device’s manufacturer for support.
Frequently Asked Questions
1. Go to your device’s settings.
2. Tap on “Wi-Fi & Internet”.
3. Select “Wi-Fi Direct”.
4. Tap the toggle switch to turn on Wi-Fi Direct.
And just like that, you’ve turned on Wi-Fi Direct on your Android device!
Can I use Wi-Fi Direct to connect my Android phone to other devices without a wireless network?
Yes, you can! Wi-Fi Direct creates a direct connection between devices, so you don’t need a wireless network to connect. This means you can transfer files, play games, and share media with other devices that support Wi-Fi Direct.
What are the steps to enable Wi-Fi Direct on an Android tablet or smartphone?
Enabling Wi-Fi Direct on an Android tablet or smartphone is a straightforward process. Here are the steps:
1. Go to your device’s settings.
2. Tap on “Connections” or “Wireless & Networks”.
3. Select “Wi-Fi Direct”.
4. Tap the toggle switch to turn on Wi-Fi Direct.
And that’s it! You’ve successfully enabled Wi-Fi Direct on your Android tablet or smartphone.
Conclusion
Thanks for visits imagerocket.net for reading this step-by-step guide on enabling Wi-Fi Direct on your Android device. We hope that this article has been helpful in providing you with the necessary information and instructions to enable this feature on your device.
Wi-Fi Direct is a great feature that allows you to connect your Android device to other devices without the need for a Wi-Fi network. With Wi-Fi Direct, you can easily share files, photos, videos, and more with other devices that support this feature.
By following the steps outlined in this article, you can quickly and easily enable Wi-Fi Direct on your Android device. Remember to check that your device and the device you want to connect to both support Wi-Fi Direct.
In summary, Wi-Fi Direct is a convenient feature that can make it easier to share files and connect with other devices. With this step-by-step guide, you can easily enable Wi-Fi Direct on your Android device and start taking advantage of this feature today.


