Call forwarding is a feature that allows you to redirect incoming calls to another phone number or voicemail. It is a useful tool that can help you stay connected even when you are not available to answer calls. Mastering call forwarding on your Android device can be a game-changer, especially if you are someone who is always on the go.
In this blog post, we will be sharing essential configuration tips to help you master call forwarding on your Android device. Whether you are using a Samsung, LG, or any other Android device, these tips will help you customize your call forwarding settings to meet your needs. So, let’s dive in and explore how you can make the most of this feature.. You may need to know : Mastering Android: Step-by-Step Guide to Setting Up Voicemail

Call forwarding is a useful feature that allows you to redirect incoming calls to another number or voicemail. It comes in handy when you are unable to take calls or want to transfer them to a different device. In this article, we will explore how to enable, manage, troubleshoot, and utilize advanced call forwarding features on your Android device.
1. Enabling Call Forwarding
Enabling call forwarding is a straightforward process. Here are the steps:
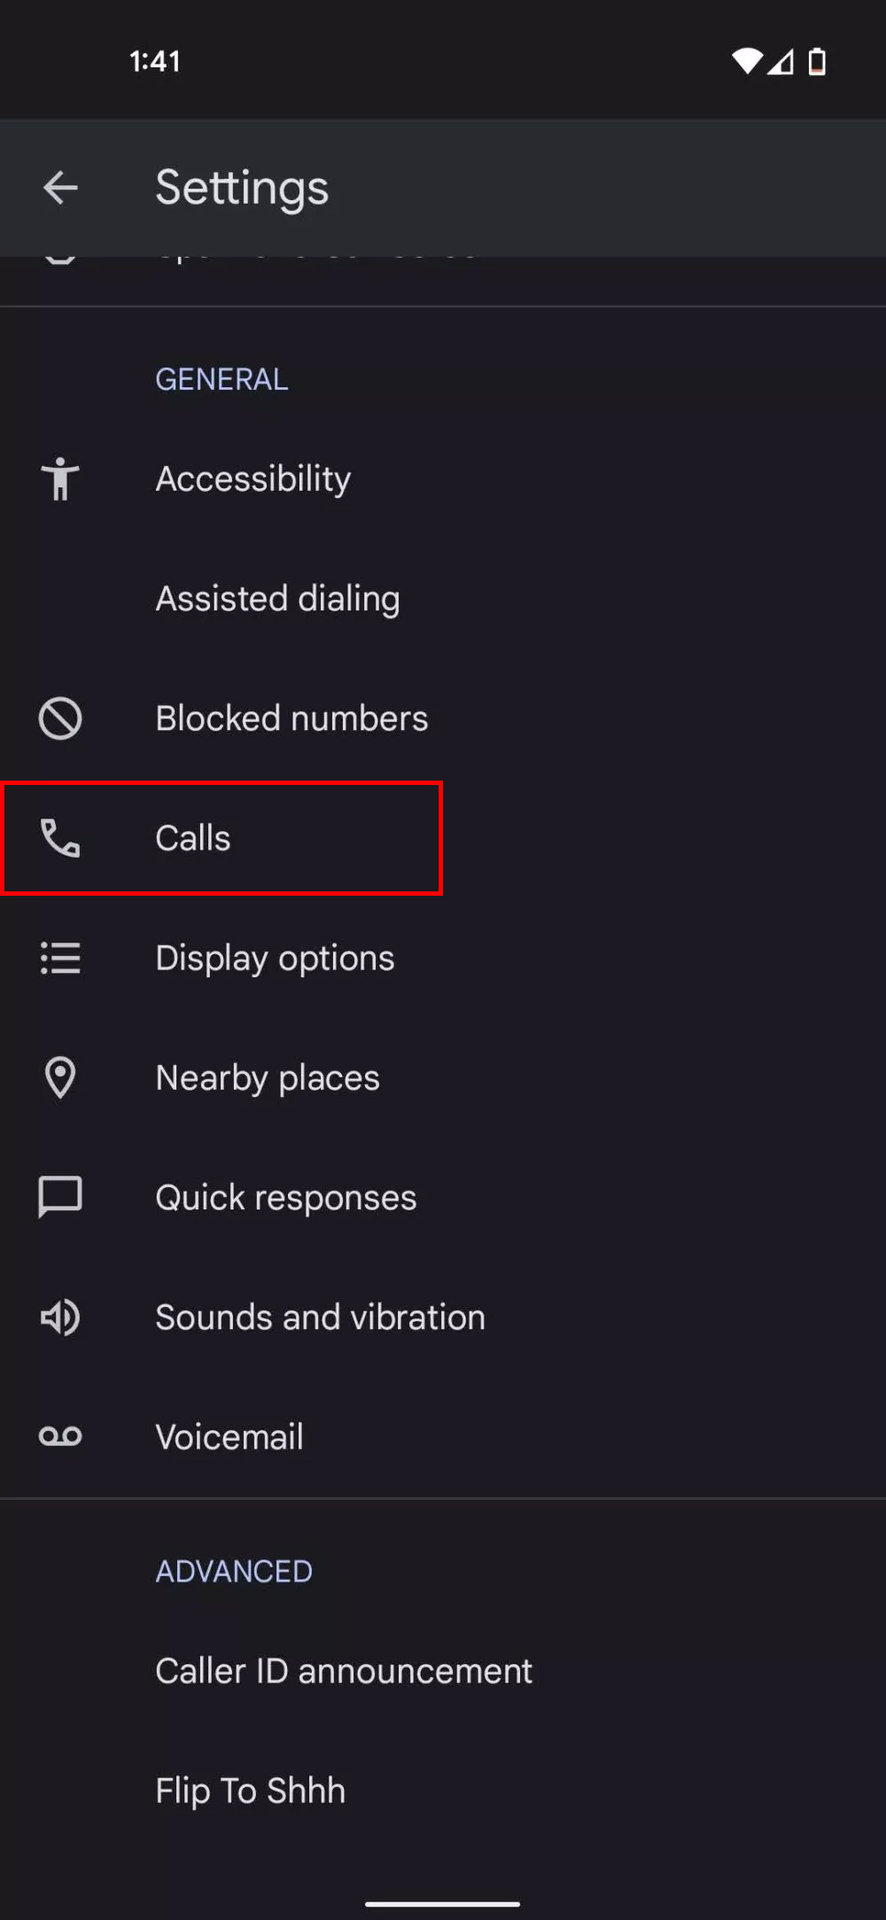
– Accessing call settings: Open the Phone app and tap on the three-dot menu. Select Settings and then Call settings.
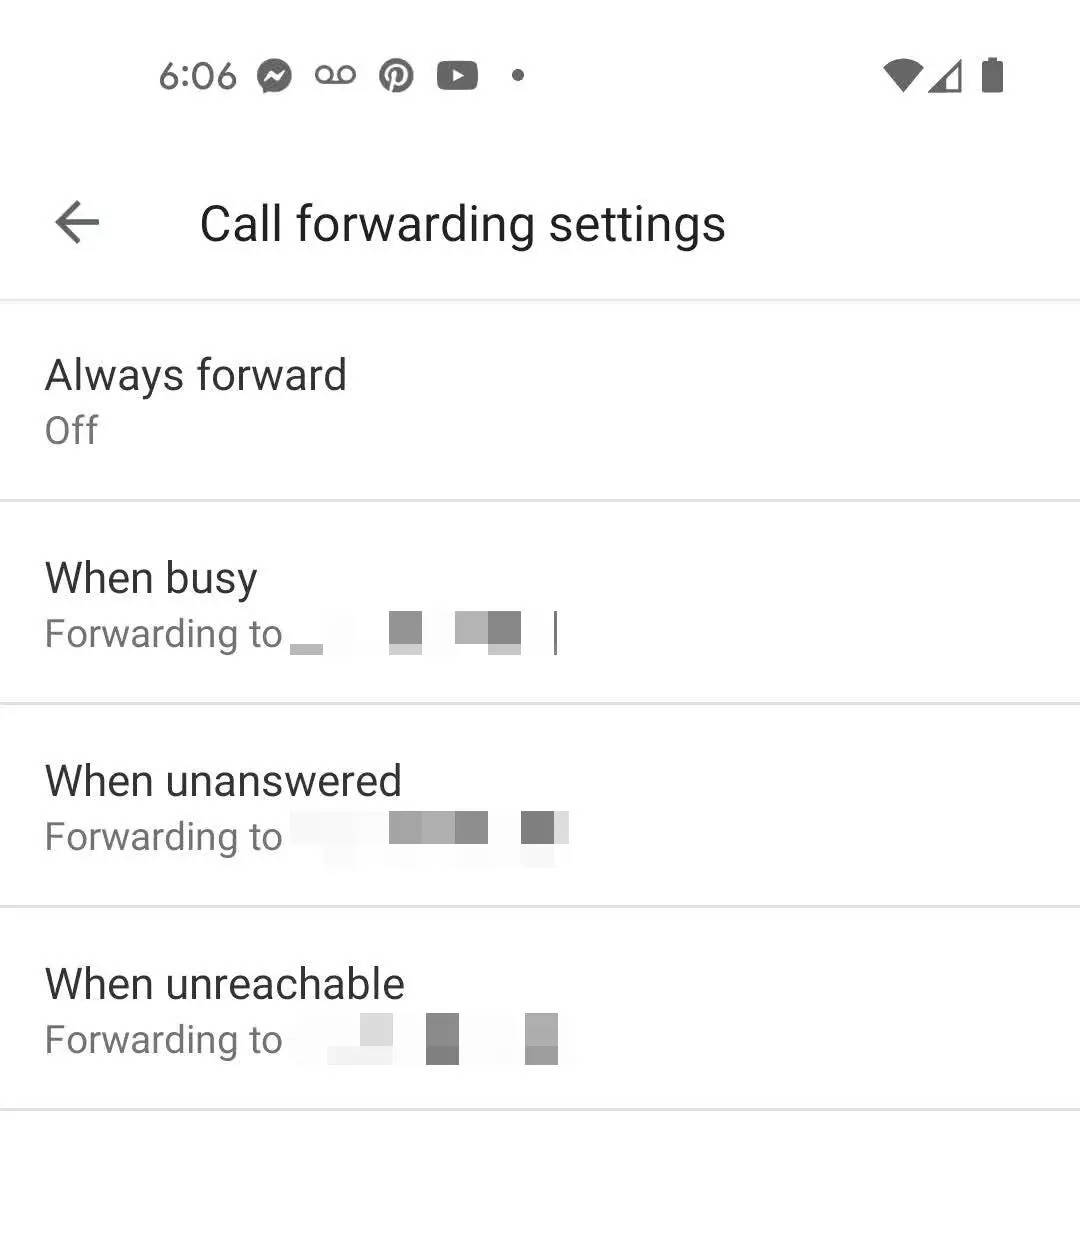
– Choosing a forwarding method: Tap on Call forwarding and select the type of forwarding you want to enable. You can choose from the following options:
– Always forward: All incoming calls will be forwarded to the specified number.
– Forward when busy: Calls will be forwarded when your number is busy.
– Forward when unanswered: Calls will be forwarded when you don’t answer the phone.
– Forward when unreachable: Calls will be forwarded when your phone is turned off or out of range.
2. Managing Call Forwarding
You can edit or remove existing forwarding rules and set up conditional call forwarding. Here’s how:
– Editing or removing existing forwarding rules: Go to Call forwarding and select the rule you want to edit or remove. Make the necessary changes or tap on Disable to remove it.
– Setting up conditional call forwarding: Conditional call forwarding allows you to forward calls based on specific conditions such as a certain time of day or when you’re roaming. Go to Call forwarding and select the option that suits your needs.
3. Troubleshooting Call Forwarding
If you’re experiencing issues with call forwarding, here are some common problems and solutions:
– Calls not forwarding: Check if you have enabled call forwarding and if the forwarding number is correct.
– Calls forwarding to the wrong number: Double-check the forwarding number and make sure it’s entered correctly.
– Calls not reaching voicemail: Ensure that voicemail is set up and working correctly.
– Testing call forwarding functionality: To test if call forwarding is working, call your phone from another device and see if the call is forwarded to the designated number.
4. Advanced Call Forwarding Features
Simultaneous ringing and call cascading are advanced features that can enhance your call forwarding experience. Here’s how to use them:
– Simultaneous ringing: This feature allows calls to ring on multiple devices at the same time. Go to Settings > Calls > Call forwarding > Simultaneous ringing and select the devices you want to ring simultaneously.
– Call cascading: Call cascading allows calls to be forwarded to multiple numbers in a specific order. Go to Call forwarding > Call cascading and select the numbers you want to forward calls to.
Utilizing third-party apps can also provide additional functionality for call forwarding, such as custom forwarding rules and call blocking. Overall, mastering call forwarding on Android can help you stay connected and never miss an important call.
Frequently Asked Questions
Setting up call forwarding on your Android device is easy and straightforward. Follow these steps to get started:
1. Open the phone app on your Android device
2. Tap the three dots at the top right corner of the screen to access the settings menu
3. Select “Settings” from the drop-down menu
4. Scroll down and select “Call forwarding”
5. Choose “Voice call” or “Video call” depending on your preference
6. Enter the phone number you want to forward your calls to
7. Tap “Enable” to activate call forwarding
Can I forward calls to multiple numbers using call forwarding on Android?
Yes, you can forward calls to multiple numbers using call forwarding on your Android device. Follow these steps to set up call forwarding to multiple numbers:
1. Open the phone app on your Android device
2. Tap the three dots at the top right corner of the screen to access the settings menu
3. Select “Settings” from the drop-down menu
4. Scroll down and select “Call forwarding”
5. Choose “Voice call” or “Video call” depending on your preference
6. Enter the first phone number you want to forward your calls to
7. Tap “Add new” to add another phone number
8. Repeat steps 6 and 7 to add more phone numbers
9. Tap “Enable” to activate call forwarding to multiple numbers
Is it possible to customize the settings for call forwarding, such as choosing when calls are forwarded or setting different forwarding options for specific contacts?
Yes, it is possible to customize the settings for call forwarding on your Android device. Follow these steps to customize call forwarding settings:
1. Open the phone app on your Android device
2. Tap the three dots at the top right corner of the screen to access the settings menu
3. Select “Settings” from the drop-down menu
4. Scroll down and select “Call forwarding”
5. Choose “Voice call” or “Video call” depending on your preference
6. Select “Advanced settings”
7. Choose the forwarding option you want to customize, such as “Always forward” or “Forward when busy”
8. Select “Add contact” to set different forwarding options for specific contacts
9. Choose the contact you want to set a custom forwarding option for and select the desired option
10. Tap “Enable” to activate customized call forwarding settings
Conclusion
Thanks for visits imagerocket.net for reading our comprehensive guide on mastering call forwarding on Android. With the tips and configurations discussed above, you are now equipped to take full control of your phone calls and ensure that you never miss an important call again.
We hope that this guide has helped you to better understand the call forwarding feature on your Android device and how you can configure it to suit your needs. Whether you are a busy professional, a student, or just someone who wants to stay connected, call forwarding is an essential tool that can help you stay on top of your communication game.
In summary, to master call forwarding on your Android device, you need to understand the different types of call forwarding, know how to activate and deactivate it, and configure it to work seamlessly with your phone. With these essential tips, you can easily set up call forwarding on your Android device and enjoy uninterrupted communication wherever you are.
We hope you found this guide useful and informative. If you have any questions or comments, please feel free to share them with us in the comments section below.


