Do Not Disturb mode on Android is an essential tool to help you stay focused and productive. However, mastering this feature can be a challenge, especially for beginners. In this step-by-step guide, we will show you how to use Do Not Disturb mode on Android and take control of your notifications.
Firstly, let’s understand what Do Not Disturb mode is. It’s a feature on Android that allows you to silence calls, notifications, and alerts. This feature is incredibly useful when you need to concentrate on work, relax, or sleep without any interruptions. With Do Not Disturb mode, you can customize which notifications you want to receive and when you want to receive them. So, let’s dive in and learn how to use this feature effectively.
As we become increasingly reliant on our smartphones, it can be challenging to disconnect from the constant notifications and alerts. However, with the Do Not Disturb (DND) feature on Android devices, you can take control of your notifications and enjoy uninterrupted focus time. In this guide, we’ll explore the functionality, customization options, advanced features, and troubleshooting tips for mastering Do Not Disturb.
Table of Contents
1. Understanding Do Not Disturb
Functionality and Purpose
Do Not Disturb mode is designed to silence all notifications and alerts on your device, allowing you to focus on your tasks without distractions. You can choose to enable it manually or set it up to turn on automatically during specific times of the day. When DND is active, you can still receive calls and messages from your favorite contacts or allow specific apps to notify you.
Customization Options
Android devices offer several customization options for Do Not Disturb mode. You can choose to enable DND for a specific time or indefinitely until you turn it off manually. You can also set priority settings to receive notifications from specific contacts or apps, even when DND is active. Additionally, you can choose to allow repeat callers to break through DND in case of an emergency.
2. Setting Up Do Not Disturb
Enabling DND Mode
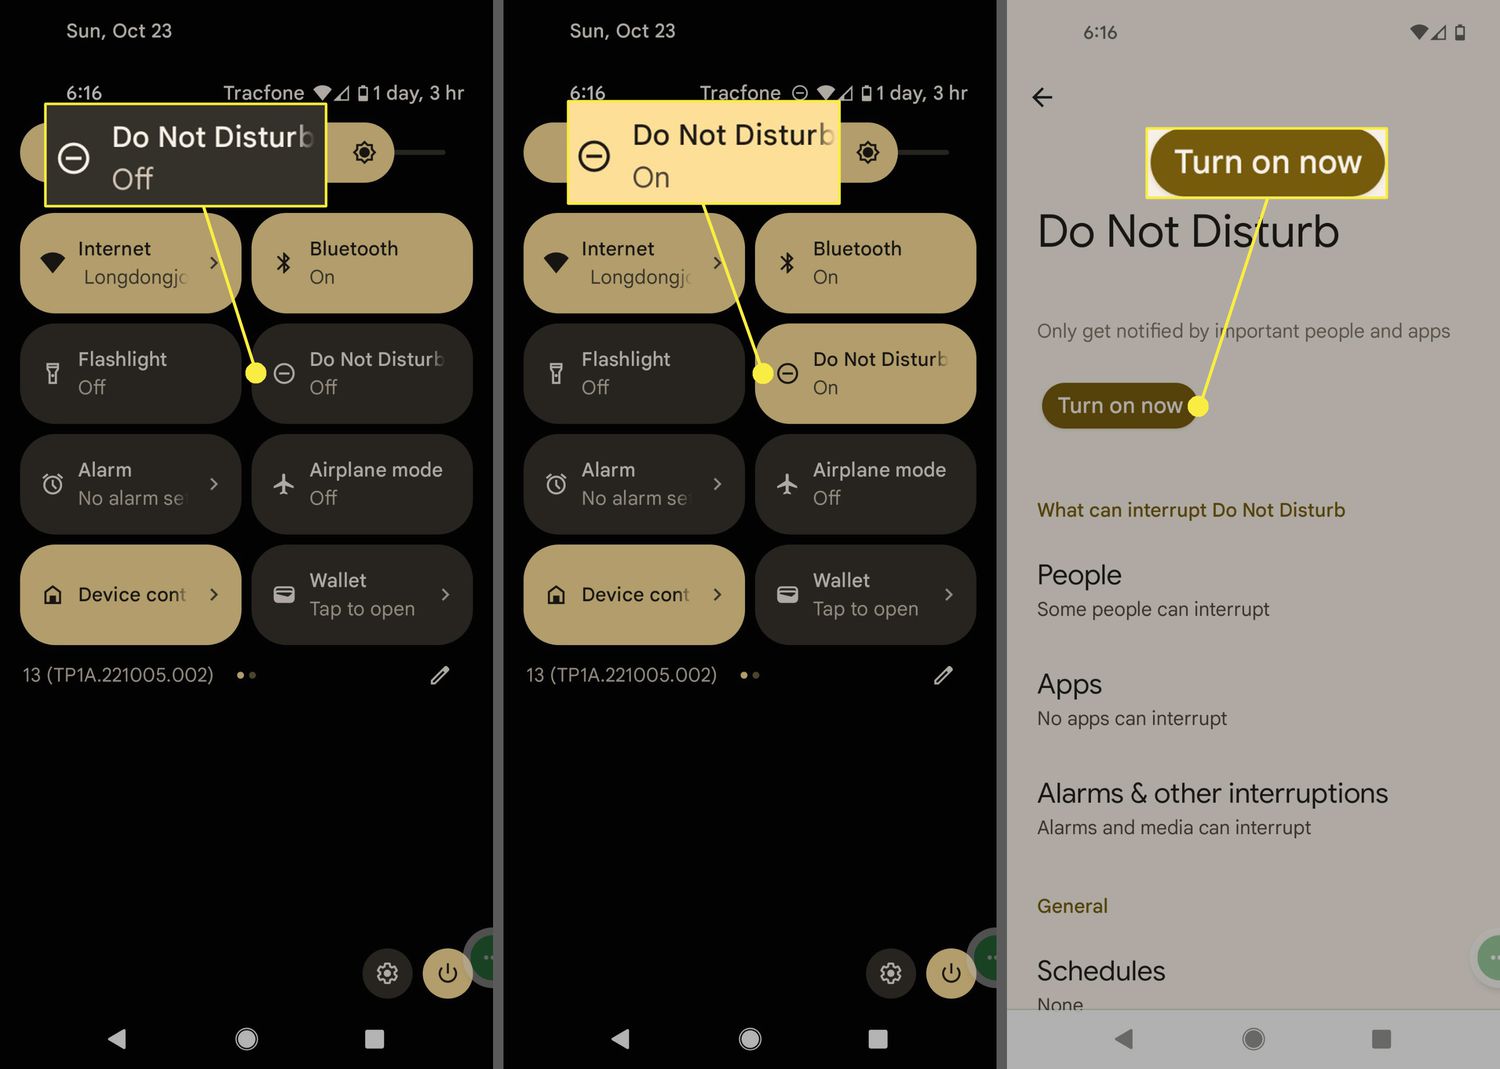
To enable Do Not Disturb mode on your Android device, go to Settings > Sound & vibration > Do Not Disturb. From there, you can choose to enable DND manually or set up automatic rules for specific times of the day.
Configuring Priority Settings
To customize your priority settings, go to Settings > Sound & vibration > Do Not Disturb > Priority only allows. Here, you can choose to allow notifications from specific contacts or apps, even when DND is active. You can also set up repeat callers to break through DND in case of an emergency.
3. Advanced Do Not Disturb Features
Scheduling DND Mode
To schedule DND mode for specific times of the day, go to Settings > Sound & vibration > Do Not Disturb > Schedules. Here, you can set up automatic rules for specific times or days of the week.
Allowing Exceptions
To allow exceptions for specific apps or contacts, go to Settings > Sound & vibration > Do Not Disturb > Allow exceptions. From there, you can choose to allow notifications from specific contacts, apps, or alarms, even when DND is active.
Using DND with Other Apps
Several third-party apps can integrate with Do Not Disturb mode to provide additional customization options. For example, the IFTTT app can trigger DND mode automatically when you arrive at work or home.
4. Troubleshooting Do Not Disturb
Common Issues
One common issue with DND mode is missing important calls or messages from specific contacts. Additionally, some users may experience issues with DND mode not turning off automatically during scheduled times.
How to Fix Them
To fix issues with missing important calls or messages, ensure that the specific contacts are added to your priority list. To fix issues with DND mode not turning off automatically, try restarting your device or resetting your DND settings.
5. Conclusion
Do Not Disturb mode is an excellent tool for taking control of your notifications and enjoying uninterrupted focus time. By customizing your settings and using advanced features, you can ensure that you only receive notifications that are important to you. Remember to schedule breaks and disconnect from your device to maintain a healthy work-life balance. Happy mastering!
Frequently Asked Questions
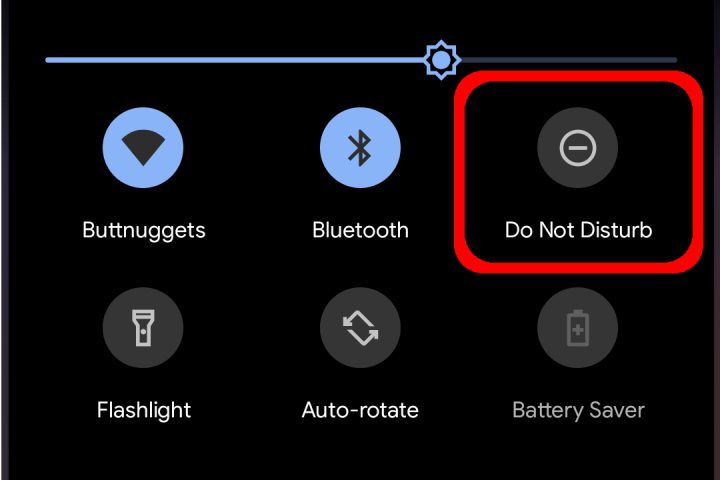
1. Swipe down from the top of your screen to access the Quick Settings panel.
2. Tap on the Do Not Disturb icon (it looks like a circle with a line through it).
3. Choose whether you want to silence all notifications or allow exceptions (such as alarms or calls from certain contacts).
4. You can also choose how long you want the mode to stay on (until you turn it off manually or for a set amount of time).
Can I schedule specific times for the Do Not Disturb mode to automatically turn on and off?
Yes, you can! Here’s how:
1. Go to Settings > Sounds and vibration > Do Not Disturb.
2. Tap on “Turn on automatically.”
3. Choose the days and times you want the mode to turn on and off.
4. You can also select “Add more” to create additional schedules.
Is there a way to allow certain contacts or apps to still ring through when Do Not Disturb is turned on?
Absolutely. Here’s what you need to do:
1. Go to Settings > Sounds and vibration > Do Not Disturb.
2. Tap on “Allow exceptions.”
3. Choose “Calls” if you want to allow certain contacts to ring through, or “Messages” if you want to allow specific apps to send notifications.
4. Select the contacts or apps you want to allow, or add new ones by tapping on the “+” icon.
By following these steps, you’ll be able to master the Do Not Disturb mode on your Android device and enjoy some much-needed peace and quiet. Whether you’re trying to focus on work, get a good night’s sleep, or just take a break from the constant barrage of notifications, this feature is a must-have.
Conclusion
Thanks for visits imagerocket.net for taking the time to read this comprehensive guide on mastering the Do Not Disturb feature on your Android device. We hope that you found it informative, helpful, and easy to follow.
As we’ve seen, the Do Not Disturb feature is a powerful tool that can help you stay focused, productive, and undisturbed in a world that’s increasingly filled with distractions. By using it effectively, you can take control of your time and attention, reduce stress and anxiety, and improve your overall quality of life.
To get the most out of Do Not Disturb, it’s important to understand how it works, what options are available, and how to customize it to suit your needs. With the step-by-step guide we’ve provided, you should now have all the knowledge and skills you need to start using Do Not Disturb like a pro.
Remember, the key to mastering Do Not Disturb is to make it work for you, not the other way around. Experiment with different settings, create custom rules for different situations, and don’t be afraid to tweak things until you find the perfect balance between staying connected and staying focused.
We hope that this guide has inspired you to explore the many benefits of Do Not Disturb and that you’ll continue to use it to improve your life and achieve your goals. Thanks again for reading, and happy focusing!


