Are you tired of constantly having to manually adjust your screen orientation on your Android device? Enabling auto-rotate is a simple solution that can save you time and hassle. In this step-by-step guide, we’ll walk you through the process of enabling auto-rotate on your Android device.
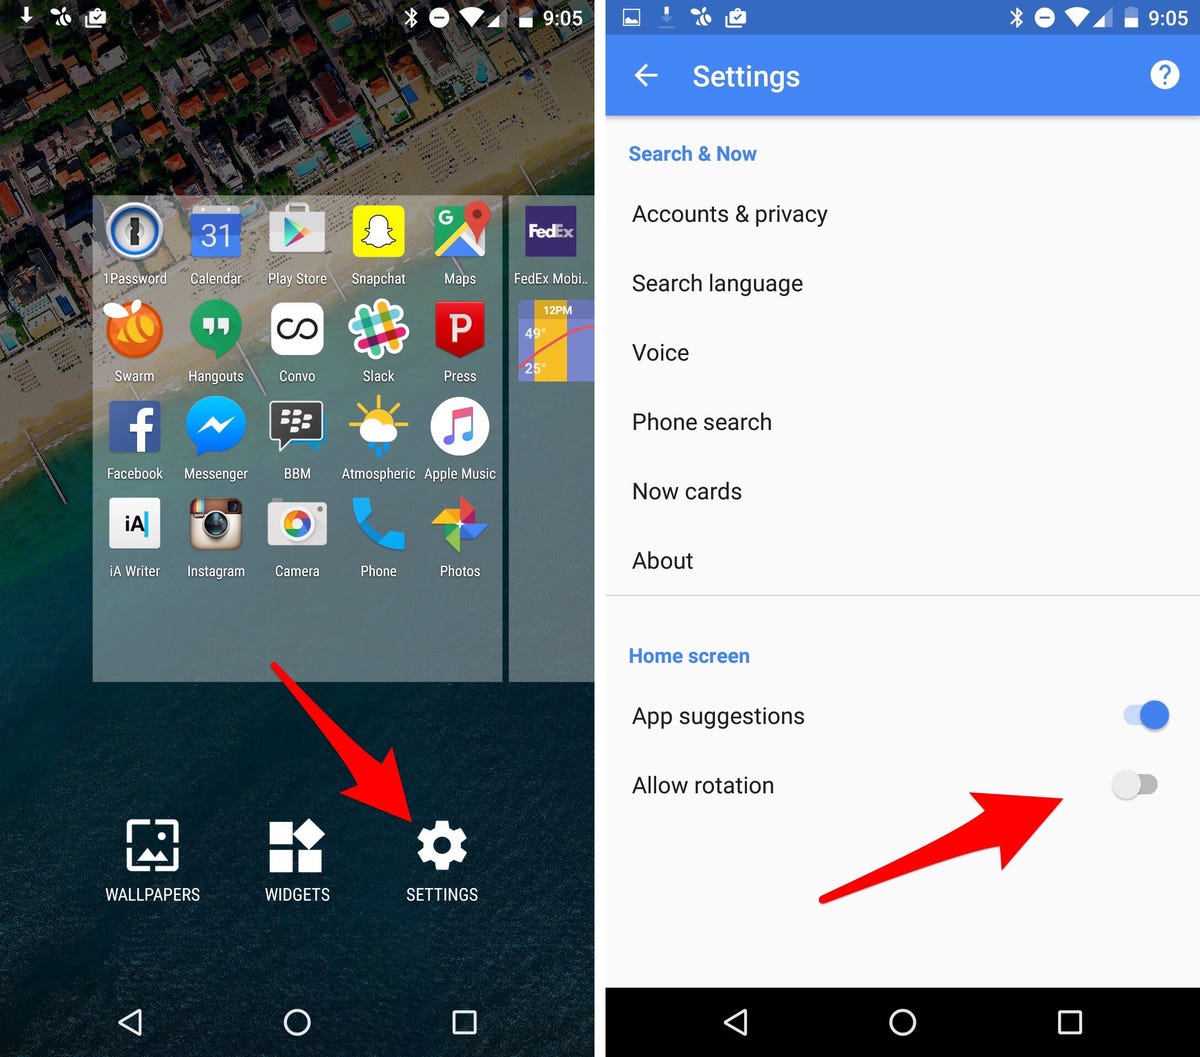
First, navigate to your device’s settings menu. From there, select “Display” and then “Advanced” to access additional display options. Look for the “Auto-rotate screen” option and toggle it on. Once enabled, your device will automatically adjust the screen orientation based on its position. It’s that easy!
By enabling auto-rotate, you can enjoy a more seamless and convenient user experience on your Android device. No more awkwardly tilting your screen or manually adjusting it every time you switch between portrait and landscape modes. Follow these simple steps and start enjoying the benefits of auto-rotate today.
Are you tired of constantly having to turn your phone or tablet to watch a video or read an article in landscape mode? The auto-rotate feature on Android devices can make your life much easier by automatically adjusting the screen orientation based on the device’s physical position. In this guide, we will show you how to enable and troubleshoot auto-rotate on your Android device.
Table of Contents
1. Understanding Auto-Rotate Feature
The auto-rotate feature on Android devices uses the device’s accelerometer to detect changes in orientation. When the device is rotated, the screen adjusts to the new orientation. This feature is particularly useful for watching videos, browsing the web, or playing games in landscape mode.
2. Enabling Auto-Rotate on Android
Enabling auto-rotate on your Android device is easy. Follow these steps:
1. Go to the Settings app on your Android device.
2. Scroll down to the Display section and tap on it.
3. Look for the Auto-rotate screen option and toggle it on.
Now your device will automatically rotate the screen orientation based on its physical position.
3. Troubleshooting Auto-Rotate Issues
If your auto-rotate feature is not working properly, here are some common problems and solutions:
– The auto-rotate option is grayed out: This could be because you have the screen locked in portrait mode. Unlock the screen and try again.
– The screen is not rotating: Try restarting your device or checking if any third-party app is causing the problem.
– The screen is rotating randomly: This could be due to a faulty accelerometer. Contact the manufacturer for a replacement.
4. Maximizing Auto-Rotate Usage
There are many apps and features that can take advantage of the auto-rotate feature on your Android device. Here are some recommended ones:
– YouTube: This app automatically adjusts the screen orientation based on the video’s aspect ratio.
– Google Maps: When navigating in landscape mode, the app will automatically rotate the map to match the orientation of the device.
– Camera: When taking photos or videos, the auto-rotate feature will adjust the orientation of the camera controls and preview.
5. Final Thoughts
The auto-rotate feature on Android devices can make your life much easier by automatically adjusting the screen orientation based on the device’s physical position. It is important to ensure that this feature is working properly to maximize its usage. We hope this guide has helped you enable and troubleshoot auto-rotate on your Android device. Remember to check for updates and contact the manufacturer for any hardware issues.
Frequently Asked Questions
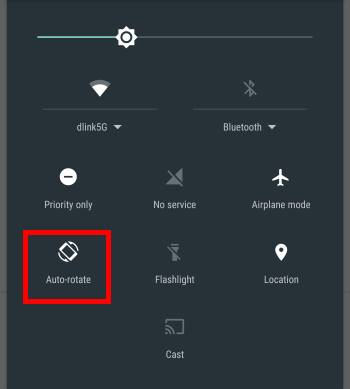
2. Look for the “Auto-rotate” icon and tap it to turn it on.
3. Now, whenever you turn your device sideways, the screen will rotate automatically.
But what if your device isn’t rotating automatically? There could be a few reasons for this, such as a malfunctioning sensor or a software issue. Here are some troubleshooting steps to fix the problem:
1. Make sure the auto-rotate feature is turned on (as described above).
2. Restart your device to see if that resolves the issue.
3. Check for any software updates and install them if available.
4. If the problem persists, try calibrating your device’s sensors. You can do this by going to “Settings” > “Accessibility” > “Auto-rotate screen” > “Calibrate”.
Lastly, some Android devices offer a shortcut or widget to quickly enable or disable auto-rotate. To see if your device has this feature, simply long-press on your home screen and look for the “Widgets” option. From there, you can search for the “Auto-rotate” widget and add it to your home screen for easy access.
Conclusion
Thanks for visits imagerocket.net for following along with this step-by-step guide to enable auto-rotate on your Android device. By mastering this feature, you will be able to enjoy a more seamless and intuitive user experience, whether you are browsing the web, watching videos, or playing games.
While the process may seem daunting at first, with a little patience and persistence, you can easily enable auto-rotate on your Android device. By following the steps outlined in this guide, you will be able to customize your device to your liking and make the most of its capabilities.
Remember, mastering Android is an ongoing process, and there is always more to learn and explore. Whether you are a seasoned Android user or just getting started, there are endless possibilities for customization and optimization. By staying curious and staying up-to-date with the latest trends and developments in the Android world, you can continue to unlock new features and functionalities and make the most of your device.
So, go ahead and give it a try! With the knowledge and skills you have gained from this guide, you are well on your way to mastering Android and taking your user experience to the next level. Happy rotating!


